
Few things crush an indoor grower’s spirit quite like watching a vibrant, fast-growing canopy suddenly go limp and develop mysterious dark spots. In a soil-less system, root zone pathogens like Pythium are an absolute nightmare. Because your reservoir actively recirculates water, a tiny microscopic fungal spore can transform from a minor blemish into a full-blown system epidemic overnight. Lacking soil to act as a buffer, your plants’ defenseless root systems are exposed to these flesh-eating water molds directly, leading to oxygen starvation, brown slime, and sudden crop failure before you can even react.
I’ve seen many growers struggle with tracking the right reapplication schedule to keep their water sterile. If you want to master the exact measurements for your tank size, check out our master guide on how to properly dose hydrogen peroxide in a reservoir to eliminate pathogens safely without burning delicate root hairs.
Why Oxygen Starvation and Root Rot Explode Indoors
Indoor hydroponic reservoirs are highly susceptible to root rot due to a perfect storm of environmental factors. Unlike outdoor aquatic systems, indoor grow spaces lack complex biological food webs. There are no beneficial micro-predators or competing bacterial colonies to keep anaerobic pathogens in check unless you explicitly add them.
The true catalyst for this issue indoors is water temperature. Under intense indoor grow lights, reservoir temperatures can easily climb past 72°F (22°C). As water warms up, its physical capacity to hold dissolved oxygen drops dramatically. Anaerobic pathogens like Pythium thrive in these warm, low-oxygen environments. When your roots are starved of oxygen, they suffocate and exude microscopic sugars that act as an open dinner invitation for destructive fungal spores to strike.
Step-by-Step Identification: Catching Root Rot Early
Do not wait for your leaves to turn yellow to check your root health. Lift your net cups or inspection lids daily and look for these telltale signs:
- The Sniff Test: Smell the air right inside your reservoir tank or near the rockwool blocks. A healthy system smells fresh, like clean rain; a compromised system smells metallic, sour, or like rotting ditch water.
- Root Color and Texture: Examine the roots dropping into the water. Healthy roots are crisp, firm, and glistening white. Pathogen-struck roots turn a dull tan, muddy brown, or jet black.
- The Slime Coating: Touch the root mass gently with clean hands. Look for a thick, gelatinous gray or brown slime coating the strands, which glues them together into a single matted clump.
- The Sheath Slip: Grab a single brown root strand between two fingers and slide down gently. If the outer skin slips right off like a soggy straw, leaving behind a fine, hair-like core, root rot is active.
The 3-Step Organic Hydrogen Peroxide Treatment Plan
When root rot takes hold, hydrogen peroxide ($H_2O_2$) is your best organic line of defense. It oxidizes organic pathogens on contact and breaks down into pure oxygen and water, meaning it won’t permanently skew your baseline PPM.
Step 1: The Surgical Root Flush
Drain your infected nutrient reservoir entirely. Remove the plants and rinse the root masses under cold, running tap water. Gently untangle the roots and use your fingers to slough away the loose, dead brown slime. Trim away any completely black, dead roots with shears dipped in isopropyl alcohol.
Step 2: The Shock Sterilization Dose
Refill your reservoir with fresh, plain water (no nutrients yet) and add a shock dose of food-grade hydrogen peroxide.
- The Treatment Ratio: Add 3 to 5 mL of 34% food-grade $H_2O_2$ (or roughly 2 to 3 tablespoons of standard 3% store-bought $H_2O_2$) per gallon of water.
- Run your water pumps for 2 to 3 hours to let the solution deeply sterilize the buckets, root zones, and lines. You will see active bubbling as it oxidizes the organic rot.
Step 3: Drain and Reset the Nutrient Tank
Never drop concentrated plant food directly into a heavy peroxide shock bath. After the 3-hour sterilization run, drain the water out completely. Refill the system with your standard fresh nutrient mix, and add a standard maintenance dose of $H_2O_2$ (1 mL of 34% or 1 tablespoon of 3% per gallon).
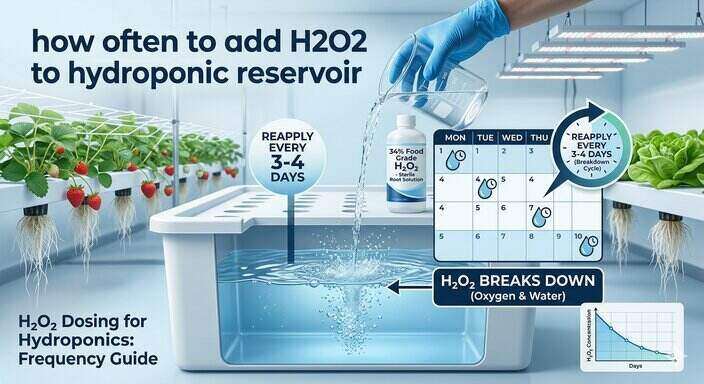
To keep the system sterile moving forward, reapply this maintenance dose every 3 to 4 days, as hydrogen peroxide naturally breaks down into harmless water within 72 hours inside an active reservoir.
Pro Prevention Tips: Keep Your Water Zone Spotless
Once your water is clean, establish these cleanroom habits to ensure pathogens don’t find a second window of opportunity:
- Insulate Your Reservoir Tubs: Wrap your water tanks in reflective mylar insulation film to shield them from ambient tent heat and keep your water temperatures locked below 68°F (20°C).
- Run Heavy Duty Air Stones: Drop a high-output commercial air pump with large ceramic air stones into your tank. Constant bubbles maximize dissolved oxygen, making it impossible for anaerobic rots to establish.
- Sterilize Your Setup Tools: Never use the same dip-cups, EC pens, or water transfer hoses across different reservoirs without dipping them into a sanitizing bucket first.
Frequently Asked Questions (FAQs)
1. Can I use standard 3% topical peroxide from the grocery store?
Yes, you can use standard 3% brown-bottle hydrogen peroxide. However, it often contains chemical stabilizers (like sodium stannate) to extend its shelf life. For pure, indoor food production, switching to un-stabilized 34% food-grade peroxide diluted down with distilled water is the cleanest option.
2. Will adding hydrogen peroxide kill beneficial microbes?
Yes, hydrogen peroxide is a non-selective sterilizer. It will instantly wipe out your beneficial root bacteria (Bacillus Velezensis or Mycorrhizae) along with the bad ones. If you choose a sterile system path using $H_2O_2$, you cannot use beneficial bio-additives simultaneously.
3. How do I know if the peroxide burned my plant roots?
If you over-dose your reservoir, the roots will turn an artificial, ghostly chalk-white color and lose their fine, fuzzy root hairs within 24 hours. The leaves above will quickly droop and show dry, crispy margins due to the root tips being chemically cauterized.
Conclusion
Managing how often you add hydrogen peroxide to your hydroponic reservoir is a balancing act, but once you get into the 3-to-4-day maintenance rhythm, you can effectively lock pathogens out of your grow room for good. Keep your water temperatures low, keep your air pumps cranked high, and use peroxide defensively to protect your hard-earned canopy.
Expert Tip: In my indoor tent, I found that keeping a dedicated logbook zip-tied directly to my reservoir stand changed the game. Peroxide breaks down invisibly, so marking down the exact day of your last dose ensures you never miss that crucial 3-day reapplication window before airborne spores try to settle back in!